.jpg)
Processing Fish
The Processing Fish project was my senior capstone project at Olin College of Engineering. It was an eight-month-long project that focused around the question: is it possible to automate intricate fish processing tasks? For NDA reasons, I'm not allowed to cover all the parts of the project I was involved in, but I am able to give an overview of what I did and what we were able to accomplish. This project started from nothing. Our sponsor company and liaison from that company had relatively little technical knowledge and were prepared to let our team find our own footing. This led to our project being broken into two: testing feasibility and designing a prototype.
Part 1
The first part of this project was based around seeing if automating processes inside the fish processing industry would even be possible. To do this, we designed end effectors that emulated the processes used in human fish processing that could attach to a Kinova seven-degree-of-freedom arm. We chose this as our starting point because it allowed us to test feasibility as quickly as possible, and it also let us play around with a pretty fancy robot arm. With this setup, we were able to prove that the mechanical processes we were hoping to conduct would be possible. However, once the novelty of our robot arm wore off, we found that the control systems we had to use to control it were extremely complex and that the form factor of the arm significantly restricted our end effector designs. For these reasons, we decided to move away from our robot arm to a much simpler four-degree-of-freedom gantry, thus kicking off part two.


A 3D printed end effector that fit onto the Kinova arm. This Design used the internals of a griping end effector designed for the Kinova so we had to work with the lead screw that the original end effector used.
This is a video of very early testing with the end effector show above attached to the Kinova arm.
Part 2
The second part of this project was only 3 months long and spanned from starting design on a custom gantry system and new end effectors to a fully functional prototype. Our team and myself especially were very excited to design our own gantry system for this project. I ended up being the sole designer and manufacturer of our gantry prototype, which resulted in me putting myself through a master class of how to and how not to design for manufacturing and assembly. After a conversation with some alumni who specialized in robotics at Moderna during the early design phase of the gantry, we realized that our goals were not actually performance, as there are hundreds of industry-level gantries that already exist, but instead modularity and simplicity with just enough performance to perform the processes we were looking to conduct. It was these goals that led to me creating our gantry, which uses a CoreXY belt system for large X and Y movements and a rack and pinion mounted to the gantry head for Z movements. At the end of three months, we had a fully bespoke gantry that was more than capable of positioning our bespoke end effectors, of which I can’t talk so much about, anywhere we wanted them on a fish fillet.
.jpg)
.jpg)
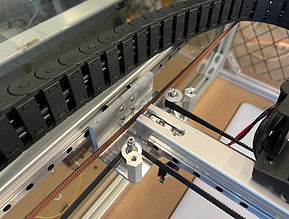
On the left a picture of the COREXY belt routing in the x shuttles. In the middle a photo of the entire gantry system. On the right a photo of the interior of the gantry system.
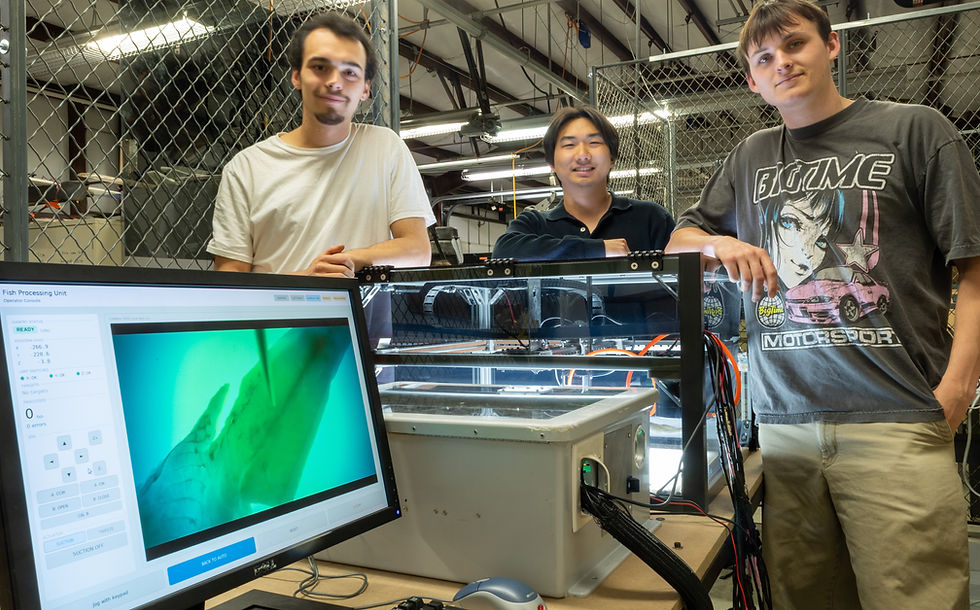
A demonstration video of the vision software detecting some bolts and a mock magnetic end effector picking them up. This all happens at slow move speeds and not on real fish for live demonstration purposes.
Learnings
For my capstone project, I really wanted to focus on iteratively refining a project and getting to delve deeper into improving design for manufacturing and assembly inside one of my projects, and unfortunately, I really didn’t get that from this project. Our tight schedule and large scope meant that I was putting in lots of extra hours just to get done on time, but ultimately, I’m quite proud of the end result. While there's nothing even remotely groundbreaking on it as far as gantry design goes, it performed its task well, and being able to be solely responsible for every facet of its creation provided lots of insight into how things should be designed and documented to make it easiest to manufacture and install. My two biggest learnings came from spending the time to minimize critical tolerances to as few as possible and to make my designs last. What I mean by making my designs last is I found that if I designed something and then went out and tried to find the bolts, stock, manufacturing process, etc., I ended up with a mess of different bolt sizes and lengths, different stock thicknesses, and multi-step manufacturing processes. Whereas, if I thought through or even sometimes wrote out a list of the stock, bolts, and machines I was going to use to make a part before even designing the part, I ended up with a much simpler bill of materials and a much easier manufacturing and assembly process.

.jpg)
On the left an image of me presenting at our capstone presentation talking about essentially nothing as we learned only a few days before we were unable to talk in depth about our end effectors. On the right a team photo with the gantry.